This is the multi-page printable view of this section.
Click here to print.
Return to the regular view of this page.
The Artefacts Toolkit (beta)
Using the Artefacts Toolkit
The Artefacts Toolkit is under constant development, improving and adding new features. Please check back often!
The Artefacts Toolkit is a Python package designed to improve developer productivity. It provides a collection of helper functions that simplify common testing tasks and integrate with the Artefacts platform.
The toolkit is organized into the following modules:
Installation
pip install artefacts-toolkit
Note
The Artefacts Toolkit is designed to be used together with the Artefacts CLI, artefacts.yaml, and the Artefacts Dashboard. Some functions may work without it, but cannot be guaranteed.
- Nav2 - An example project using the Nav2 navigation stack and Gazebo.
1 - Configuration Helpers in the Artefacts Toolkit
The Artefacts Toolkit Configuration Helpers are functions that allow you to interact with configurations you have set in your artefacts.yaml file.
Import with:
from artefacts_toolkit.config import get_artefacts_param
Functions
Function Reference
get_artefacts_param
Returns a parameter set in the artefacts.yaml file. If param_type is set to launch, it will be returned as type string so that it can be used as a ROS launch argument.
This function is particularly useful for parametric testing. When you define a list of parameter values in your artefacts.yaml file (e.g., launch/world: ["empty.sdf", "bookstore.sdf", "restaurant.sdf"]), the artefacts run command will execute your test multiple times - once for each value in the list. During each test execution, get_artefacts_param("launch", "world") will automatically return the current parameter value for that specific test run.
This becomes especially powerful for grid-based testing! With three parameters that each have three possible values, Artefacts will automatically execute your test 27 times (3 × 3 × 3) while your launch file code remains unchanged.
get_artefacts_param(
    param_type,
    param_name,
    default=None,
    is_ros=True
)
Parameters
| Parameter |
Type |
Description |
Default |
param_type |
str |
The namespace/category of the parameter (e.g., “launch” in “launch/world”) |
Required |
param_name |
str |
The specific parameter name (e.g., “world” in “launch/world”) |
Required |
default |
any |
Value to return if the parameter isn’t found in artefacts.yaml. |
None |
is_ros |
bool |
Whether the parameter should be converted to a ROS parameter format |
True |
Returns
The function returns the parameter value with the following behavior:
- If
param_type is "launch" and is_ros is True: Returns the value as a str, regardless of its original type in the artefacts.yaml file. This is so that it can be used as a ros launch argument.
- if
default is set to anything other than None, then the value will be returned if artefacts is unable to find the requested parameter. This can be useful when (for example) using launch_test instead of artefacts run but you do not wish to make any code changes. It will also prevent KeyError exceptions.
- For all other cases: Returns the value with its original type from the YAML file (e.g.,
list, dict, int, float, str, etc.)
Note
- Currently only supports ROS Params / ROS launch arguments.
- Parametric tests will execute sequentially when running artefacts locally. When running on the platform, they will run in parallel (the maximum number of concurrent tests is determined by your subscription plan).
Example
Given an artefacts.yaml file with the following configuration set:
scenarios:
  defaults:
    output_dirs: ["output"]
    metrics:
        - /odometry_error
    params:
      launch/world: ["bookstore.sdf", "empty.sdf"]
Getting the parameter in our test launch file like so:
def generate_test_description():
    try:
        world = get_artefacts_param("launch", "world")
    except FileNotFoundError:
        world = "empty.world"

    run_headless = LaunchConfiguration("run_headless")
    launch_navigation_stack = IncludeLaunchDescription(
        PythonLaunchDescriptionSource(
            [
                os.path.join(
                    get_package_share_directory("sam_bot_nav2_gz"),
                    "launch",
                    "complete_navigation.launch.py"
                ),
            ]
        ),
        launch_arguments=[("run_headless", run_headless), ("world_file", world)],
    )

...# Rest of launch test file
This will run the same test twice - once in an empty world and once in a bookstore world - without any changes to your launch file code between runs.
get_artefacts_params
Loads all parameters set in artefacts.yaml for a given run, providing them as dict. Can be used with regular dict methods such as .get()
Parameters
None
Returns
The function returns all parameters for a given run as type dict.
Note
What is returned will differ depending on whether you are using launch_test_file not in your artefacts.yaml file to point to your test file. With launch_test_file the parameters will be “rosified”, otherwise (e.g with pytest_file, run) they will not. As an example:
scenarios:
  defaults:
    output_dirs: ["output"]
    metrics:
        - /odometry_error
    params:
      my_test_node/parameter_1: [0.1, 0.2]
      my_test_node/parameter_2: ["a", "b"]
will return the following when using launch_test_file:
# Run 1
{
    'my_test_node': {
        'ros__parameters': {
            'parameter_1': 0.1,
            'parameter_2': 'a'
        }
    }
}

# Run 2
{
    'my_test_node': {
        'ros__parameters': {
            'parameter_1': 0.2,
            'parameter_2': 'b'
        }
    }
}
and the following when using pytest_file:
# Run 1
{
    'my_test_node/parameter_1': 0.1,
    'my_test_node/parameter_2': 'a'

}

# Run 2
{
    'my_test_node/parameter_1': 0.2,
    'my_test_node/parameter_2': 'b'

}
Example
Given an artefacts.yaml file with the following configuration set:
scenarios:
    defaults:
        params:
            headless: "True"
We can set a flag on our launch_description for a headless simulation as follows:
@launch_pytest.fixture(scope="module")
def launch_description(rosbag_recording):
    pkg_path = Path(get_package_share_directory("my_package"))
    try:
        headless = get_artefacts_params().get("headless", "False")
    except RuntimeError:
        # If artefacts params are not available, default to False
        headless = "False"

    start_launch = IncludeLaunchDescription(
        PythonLaunchDescriptionSource(
            str(pkg_path / "launch" / "mytestfile.launch.py")
        ),
        launch_arguments={
            "headless": headless,
        }.items(),
    )
merge_ros_params_files
Merges two ROS2 yaml parameter files into one, overriding the values in the first one (source) with the values in override
merge_ros_params_files(
    source,
    override,
    destination,
    rosify=False
)
Parameters
| Parameter |
Type |
Description |
Default |
source |
str |
Path to original parameter file to be overridden |
Required |
override |
str |
Path to parameter file containing parameters to override |
Required |
destination |
str |
Path to where new parameter file should be saved |
Required |
rosify |
bool |
Converts params to ros2 param file nested format if True |
False |
Returns
None: The newly made merged parameter file will be available at the path specified in destination
Example
Given the following source and override yaml:
# source
outer:
    inner1: 1
    inner2:
        leaf: keep
flat: src

# override
outer:
    inner2:
        leaf: replaced
        new_leaf: 321
    inner3: added
flat: override
We will get the following new yaml file saved to destination as follows:
# rosify=False (Default)
outer:
    inner1: 1
    inner2:
        leaf: replaced
        new_leaf: 321
    inner3: added
flat: override
With rosify=True, parameters will be nested under ros__parameters for the appropriate node:
#source
controller_server:
    ros__parameters:
        enable_stamped_cmd_vel: true
        controller_frequency: 20.0
        min_x_velocity_threshold: 0.001

#override
controller_server/controller_frequency: 30
controller_server/min_x_velocity_threshold: 0.005
controller_server/min_y_velocity_threshold: 0.5

#destination
controller_server:
    ros__parameters:
        enable_stamped_cmd_vel: true
        controller_frequency: 30
        min_x_velocity_threshold: 0.005
        min_y_velocity_threshold: 0.5
2 - Chart Helpers in the Artefacts Toolkit
The Artefacts Toolkit Chart helpers are designed to help you with visualising data received from topics while running tests.
Import with:
from artefacts_toolkit.chart import make_chart
Functions
Function Reference
make_chart
Creates an interactive HTML chart based on data from two provided topics.
make_chart(
    filepath,
    topic_x,
    topic_y,
    field_unit=None,
    output_dir="output",
    chart_name="chart",
    file_type="rosbag"
    output_format="html"
)
Parameters
| Parameter |
Type |
Description |
Default |
filepath |
str |
Path to the data file (rosbag) |
Required |
topic_x |
str |
Topic name for x-axis. Use “Time” to plot against time |
Required |
topic_y |
str |
Topic name for y-axis. Use “Time” to plot against time |
Required |
field_unit |
str |
Unit of measurement for the field data (e.g., “m/s”, “rad”) |
None |
output_dir |
str |
Directory where the chart will be saved |
"output" |
chart_name |
str |
Name of the generated chart file |
"chart" |
file_type |
str |
Type of data file. Currently supports “rosbag” |
"rosbag" |
output_format |
str |
Output file type. Choose from “html” or “csv” |
"html" |
Returns
None:
- When
output_format="html" : Creates a plotly html chart <chart_name>.html at output_dir but doesn’t return any value.
- When
output_format=“csv” : Creates a csv file <chart_name>.csv at output_dir` but doesn’t return any value. The Dashboard will automatically try to convert csv files to charts upon upload. Useful when wanting to keep file sizes down.
Note
- Currently only supports creating charts from rosbags
- When using “Time” as one of the topics, the function will automatically plot the other topic against that topic’s timestamp if available. If the topic does not have timestamps in its message structure, the rosbag’s time will be used.
Example
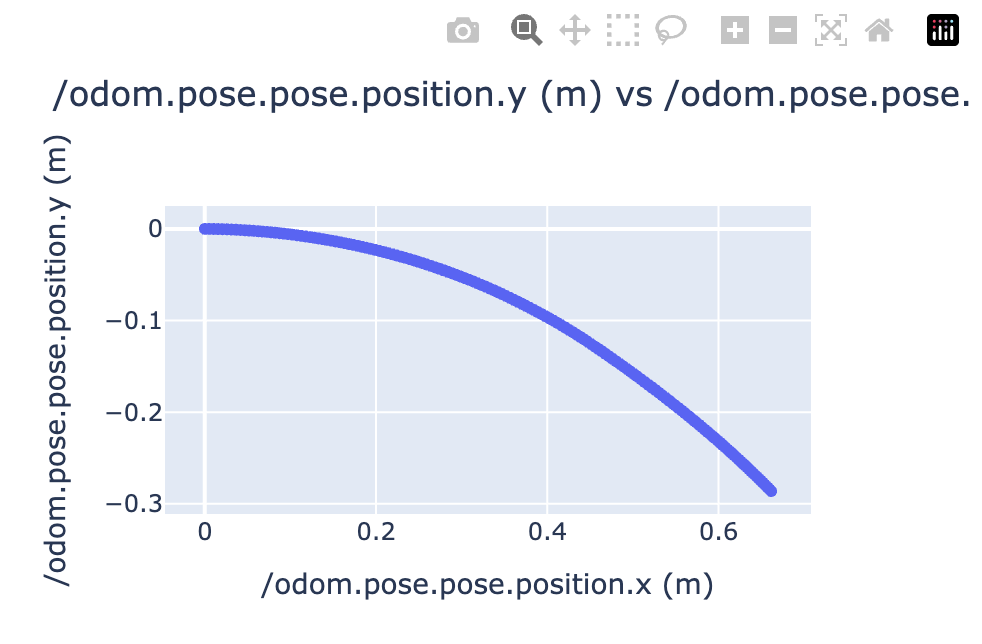
The following example adds the make_chart function post shutdown, i.e after the test has completed and rosbag saved.
# my_test_file.launch.py
# test code

...

@launch_testing.post_shutdown_test()
class TestProcOutputAfterShutdown(unittest.TestCase):
    def test_exit_code(self, rosbag_filepath):
        make_chart(
            rosbag_filepath,
            "/odom.pose.pose.position.x",
            "/odom.pose.pose.position.y",
            field_unit="m",
            chart_name="odometry_position",
        )
Producing the following chart:
3 - Gazebo Helpers in the Artefacts Toolkit
The Artefacts Toolkit Gazebo Helpers provide convenient functions to interact with your Gazebo simulations while running tests. These utilities allow you to inspect simulation objects, access model positions, as well as bridge topics between Gazebo and ROS2.
Import with:
from artefacts_toolkit.gazebo import bridge, gz
Functions
Function Reference
bridge.get_camera_bridge
Creates a gazebo / ros2 topic bridge for a camera topic
bridge.get_camera_bridge(
    topic_name,
    condition=None
)
Parameters
| Parameter |
Type |
Description |
Default |
topic_name |
str |
The camera topic name to bridge from Gazebo to ROS2 |
Required |
condition |
str |
Optional launch condition that determins when this bridge should be created |
None |
Returns
Node: Returns a ROS 2 Node object that runs the parameter_bridge for the specified camera topic. This node can be included in your launch description.
Note
- The bridge converts between Gazebo’s image messages (gz.msgs.Image) and ROS 2’s image messages (sensor_msgs/msg/Image)
- You need to have the ros_gz_bridge package installed in your environment
Example
The following example shows a camera bridge being created conditionally based on a launch argument. When record_video is set to “true”, the bridge will be activated, allowing ROS 2 nodes to subscribe to camera images from Gazebo. The returned Node is added to the LaunchDescription to be included in the launch process.
@pytest.mark.launch_test
def generate_test_description():
    from artefacts_toolkit.gazebo import bridge
    ...

    camera_topic = "/observation_camera/image"
    bag_recorder, rosbag_filepath = get_bag_recorder([camera_topic])
    sim = IncludeLaunchDescription(
        PythonLaunchDescriptionSource(["bringup", "/robot.launch.py"])
    )

    record_video_launch_arg = DeclareLaunchArgument(
        "record_video", default_value="true"
    )
    record_video = LaunchConfiguration("record_video")
    camera_bridge = bridge.get_camera_bridge(camera_topic, condition=IfCondition(record_video))

    return LaunchDescription(
        [
            record_video_launch_arg,
            sim,
            camera_bridge,
            controller_process,
            launch_testing.actions.ReadyToTest(),
        ]
    )
gz.get_sim_objects
Extracts model information from a Gazebo world file by parsing its XML structure. This function returns the name and original pose of all models defined in the world file.
This can useful when you need to know the initial poses of models as defined in the world file, rather than querying the running simulation (where positions might have changed due to physics, randomness, or interactions).
gz.get_sim_objects(world_file)
Parameters
| Parameter |
Type |
Description |
Default |
world_file |
str |
Path to the Gazebo world file to parse |
Required |
Returns
tuple: The function returns a tuple with two values that should be unpacked:
objects = [
    {
        "name": "model_1",
        "pose": "0 0 0 0 0 0"
    },
    {
        "name": "model_2",
        "pose": "1 2 3 0 0 0"
    },
    ...
]
- A dictionary mapping model names to poses:
objects_positions = {
    "model_1": "0 0 0 0 0 0",
    "model_2": "1 2 3 0 0 0",
    ...
}
Example
# Working with the objects_position dict
_, objects_positions = gz.get_sim_objects("world.sdf")
model_pose = objects_positions["model_1"]  # "0 0 0 0 0 0"

# Working with the objects list
objects, _ = gz.get_sim_objects("world.sdf")
for model in objects:
    print(f"{model['name']} is at position {model['pose']}")
gz.get_model_location
Gets the current (x, y, z) position of a model in a running Gazebo simulation. Unlike get_sim_objects which reads original positions from a world file, this function queries the live simulation to get the model’s current position.
gz.get_model_location(model_name)
Parameters
| Parameter |
Type |
Description |
Default |
model_name |
str |
Name of the model to query in the simulation |
Required |
Returns
tuple: Returns a tuple of three float values representing the (x, y, z) position in meters:
(x_position, y_position, z_position)
Note
- This function requires a Gazebo simulation to be running
- Returns (0.0, 0.0, 0.0) if the model position cannot be determined
Example
The example below demonstrates how to combine get_sim_objects and get_model_location to validate a pick-and-place task. It shows how to:
- Get initial positions from the world file
- Wait for a robot to complete its task
- Compare initial positions with current positions to detect which objects were moved
class TestProcOutput(unittest.TestCase):
    def test_moved_meatballs(self, proc_output, controller_process):
        # Original locations
        sim_objects, sim_objects_positions = gz.get_sim_objects("worlds/env.sdf") # this includes models poses
        meatball_models = [obj["name"] for obj in sim_objects if "karaage" in obj["name"]]
        #  Wait for the control loop to finish
        proc_output.assertWaitFor("Done with tasks execution", timeout=300)
        picked_meatballs = 0 # karaage moved for more than 10cm
        for meatball in meatball_models:
            x, y, z = gz.get_model_location(meatball)
            x_original, y_original, z_original = sim_objects_positions[meatball]
            dist = ((x - x_original) ** 2 + (y - y_original) ** 2 + (z - z_original) ** 2) ** 0.5
            if dist > 0.1: #10cm
                # Likely to have been picked and moved somewhere else
                picked_meatballs += 1
        self.assertEqual(picked_meatballs, 4)
gz.kill_gazebo
Kills the currently running gazebo process.
Returns
None: This function doesn’t return any value.
Example
from artefacts_toolkit.gazebo import gz
...

@launch_testing.post_shutdown_test()
class TestProcOutputAfterShutdown(unittest.TestCase):
    def test_exit_code(self, proc_info, controller_process, rosbag_filepath):
        gz.kill_gazebo()
        ...
gz.make_actor
Creates the necessary XML to add in an actor to your simulation. A path for the actor to move will be created based on provided waypoints, walking speed, and speed of rotation.
gz.make_actor(
    actor_name,
    waypoints,
    walk_speed=0.8,
    rotate_speed=1.8,
    enable_loop=True
)
Parameters
| Parameter |
Type |
Description |
Default |
actor_name |
str |
The name to call your actor. Noted in xml as <actor name="{actor_name}"> |
Required |
waypoints |
list |
List of waypoint coordinates. Can be either [[x,y,z], ...] for position only, or [[x,y,z,roll,pitch,yaw], ...] for position and rotation |
Required |
walk_speed |
float |
Walking speed of the actor in meters per second |
0.8 |
rotate_speed |
float |
Rotation speed of the actor in radians per second |
1.8 |
enable_loop |
bool |
Whether the actor should continuously repeat the waypoint path |
True |
Returns
str: Returns an XML string representation of a Gazebo actor:
<actor name="{actor_name}">
    <skin>
        <filename>https://fuel.gazebosim.org/1.0/Mingfei/models/actor/tip/files/meshes/walk.dae</filename>
    </skin>

    <animation name="walking">
        <filename>https://fuel.gazebosim.org/1.0/Mingfei/models/actor/tip/files/meshes/walk.dae</filename>
        <interpolate_x>true</interpolate_x>
    </animation>

    <script>
        <loop>true / false</loop>
        <delay_start>0.0</delay_start>
        <auto_start>true</auto_start>

        <trajectory id="0" type="walking">
            # The generated waypoints given the provided inputs
        </trajectory>
    </script>
</actor>
Example
Given the following waypoints:
waypoints = [
    [4, -3.2, 1.0],
    [0.8, -3.2, 1.0],
    [0.8, -6, 1.0],
    [4, -6, 1.0],
]
actor_xml = gz.make_actor("my_actor", waypoints, walk_speed=0.8, rotate_speed=1.8, enable_loop=True)
will return the following xml:
<actor name="my_actor">
    <skin>
        <filename>https://fuel.gazebosim.org/1.0/Mingfei/models/actor/tip/files/meshes/walk.dae</filename>
    </skin>

    <animation name="walking">
        <filename>https://fuel.gazebosim.org/1.0/Mingfei/models/actor/tip/files/meshes/walk.dae</filename>
        <interpolate_x>true</interpolate_x>
    </animation>

    <script>
        <loop>true</loop>
        <delay_start>0.0</delay_start>
        <auto_start>true</auto_start>

        <trajectory id="0" type="walking">
            <waypoint>
                <time>0</time>
                <pose>4 -3.2 1.0 0 0 3.141592653589793</pose>
            </waypoint>
            <waypoint>
                <time>4.0</time>
                <pose>0.8 -3.2 1.0 0 0 3.141592653589793</pose>
            </waypoint>
            <waypoint>
                <time>6.617993877991495</time>
                <pose>0.8 -3.2 1.0 0 0 -1.5707963267948966</pose>
            </waypoint>
            <waypoint>
                <time>10.117993877991495</time>
                <pose>0.8 -6 1.0 0 0 -1.5707963267948966</pose>
            </waypoint>
            <waypoint>
                <time>10.99065850398866</time>
                <pose>0.8 -6 1.0 0 0 0.0</pose>
            </waypoint>
            <waypoint>
                <time>14.99065850398866</time>
                <pose>4 -6 1.0 0 0 0.0</pose>
            </waypoint>
            <waypoint>
                <time>15.863323129985826</time>
                <pose>4 -6 1.0 0 0 1.5707963267948966</pose>
            </waypoint>
            <waypoint>
                <time>19.363323129985826</time>
                <pose>4 -3.2 1.0 0 0 1.5707963267948966</pose>
            </waypoint>
            <waypoint>
                <time>20.23598775598299</time>
                <pose>4 -3.2 1.0 0 0 3.141592653589793</pose>
            </waypoint>

        </trajectory>
    </script>
</actor>
4 - Rosbag Helpers in the Artefacts Toolkit
The Artefacts Toolkit Rosbag Helpers provide convenient functions to create, record, and extract data from ROS bag files while running tests. These utilities help you capture topic data to be processed for analysis and visualisation.
Import with:
from artefacts_toolkit.rosbag import get_bag_recorder, image_topics, message_topics
Functions
Function Reference
get_bag_recorder
Creates a rosbag2 recorder for a given list of topic names and returns the node and the filepath
rosbag.get_bag_recorder(
    topic_names,
    directory="rosbags",
    use_sim_time=False
)
Parameters
| Parameter |
Type |
Description |
Default |
topic_names |
list[str] |
List of ROS topics to record |
Required |
directory |
str |
Directory where the rosbag will be saved |
"rosbags" |
use_sim_time |
bool |
Whether to use simulation time instead of system time |
False |
Returns
tuple: Returns a tuple containing:
bag_recorder(ExecuteProcess): Launch Action that runs the recorder process.rosbag_filepath(str): Path to the rosbag file that will be created.
Note
- File format will be MCAP.
- Rosbag files are automatically named with a timestamp in the format
"rosbag2_" + yyyymmddhhmmss.
- The
bag_recorder process must be added to your LaunchDescription.
- Rosbags are automatically uploaded to the artefacts dashboard unless you use the
--no upload flag when using artefacts run.
Example
The following example shows a test launch file using the bag_recorder helper to record a rosbag, add the bag_recorder to the launch description, and later use the rosbag_filepath for an assertion test (using another rosbag helper get_final_message):
@pytest.mark.launch_test
def generate_test_description():
    camera_topics = ["/depth_cam/rgb"]
    extra_topics = ["/odom", "/noisy_estimate"]

    bag_recorder, rosbag_filepath = rosbag.get_bag_recorder(
        camera_topics + extra_topics, use_sim_time=False
    )

    test_odometry_node = ExecuteProcess(
        cmd=[
            "python3",
            "src/test_odometry_node.py",
        ]
    )
    return LaunchDescription(
        [
            test_odometry_node,
            launch_testing.actions.ReadyToTest(),
            bag_recorder,
        ]
    ), {
        "test_odometry_node": test_odometry_node,
        "rosbag_filepath": rosbag_filepath,
    }


@launch_testing.post_shutdown_test()
class TestProcOutputAfterShutdown(unittest.TestCase):
    def test_end_position(self, rosbag_filepath):
        final_distance_from_start = message_topics.get_final_message(
            rosbag_filepath, "/distance_from_start.data"
        )

        assert final_distance_from_start < 0.1, (
            f"Final distance from start is {final_distance_from_start}, expected less than 10cm"
        )
Returns the last recorded image from a provided camera topic.
image_topics.extract_camera_image(
    rosbag_file_path,
    camera_topic,
    output_dir="output"
)
Parameters
| Parameter |
Type |
Description |
Default |
rosbag_file_path |
str |
Path to the recorded rosbag |
Required |
camera_topic |
str |
Name of the ROS camera topic to take the image from |
Required |
output_dir |
str |
Directory where to save the extracted image to |
"output" |
Returns
None: The image will be saved to the output_dir specified.
Note
- Images are saved in the
.png format
- By setting
output_dir to the same directory as output_dirs in your artefacts.yaml file, the image will be automatically uploaded to the artefacts dashboard after conclusion of the test.
Example
The following example shows how to extract the last camera image from the rosbag after the test has concluded. We use the rosbag_filepath returned by the rosbag.get_rosbag_recorder function.
from artefacts_toolkit.rosbag import rosbag, image_topics
def test_exit_code(
    self, proc_info, test_odometry_node, rosbag_filepath
):
    ...

    image_topics.extract_camera_image(rosbag_filepath, "/depth_cam/rgb")
Creates a WebM video by combining all images from a provided camera topic.
image_topics.extract_video(
    bag_path,
    topic_name,
    output_path,
    frame_rate=20
)
Parameters
| Parameter |
Type |
Description |
Default |
bag_path |
str |
Path to the recorded rosbag |
Required |
topic_name |
str |
Name of the ROS camera topic to create the video from |
Required |
output_path |
str |
Path where the video will be saved (.webm) |
Required |
frame_rate |
int |
Frame rate to use for the created video |
20 |
Returns
None: The video file will be saved to the output_path specified.
Notes
Note
- Videos will be saved in WebM format. It will be automatically set if not present in
output_path
- By saving to a directory specified in
output_dirs in your artefacts.yaml file, the video will be automatically uploaded to the artefacts dashboard.
Example
The following example shows how to extract a video from the rosbag after the test has concluded. We use the rosbag_filepath returned by the rosbag.get_rosbag_recorder function.
from artefacts_toolkit.rosbag import rosbag, image_topics
def test_exit_code(
    self, proc_info, test_odometry_node, rosbag_filepath
):
    ...

    image_topics.extract_video(rosbag_filepath, "/depth_cam/rgb", "output/depth_cam.webm")
message_topics.get_final_message
Retrieves the final message from a specified topic in a rosbag, with optional attribute access using dot notation.
message_topics.get_final_message(
    rosbag_filepath,
    topic
)
Parameters
| Parameter |
Type |
Description |
Default |
rosbag_filepath |
str |
Path to the recorded rosbag |
Required |
topic |
str |
Topic name. Use dot notation to drill down message attributes (e.g., “/distance.data”) |
Required |
Returns
Any: Returns the value of the specified message attribute. The type depends on the accessed field.
Note
- Supports attribute access using dot notation (e.g., “/distance.data”)
Example
We will use the same example from the rosbag.get_bag_recorder explanation. Note we get the data from the distance_from_start topic in order to make our assertion test.
@launch_testing.post_shutdown_test()
class TestProcOutputAfterShutdown(unittest.TestCase):
    def test_end_position(self, rosbag_filepath):
        final_distance_from_start = message_topics.get_final_message(
            rosbag_filepath, "/distance_from_start.data"
        )

        assert final_distance_from_start < 0.1, (
            f"Final distance from start is {final_distance_from_start}, expected less than 10cm"
        )